In light of numerous questions and requests, I decided to write this tutorial on making bread. I'll be using the ever-so-popular Grandma's Country White Bread recipe, and using all-purpose white flour (since that's what most of you have said you'll be using) but you can use whole wheat flour (my flour of choice) and it will turn out perfectly as well. This recipe makes 2 loaves.
Before we start, I need to point out that I am NOT a master technical bread-maker. I've experienced a lot of trial and error over the years with bread-making. There are many, many, many ways to make bread and have successful outcomes. My way is not the only way, and may not even be the "best" way for everyone, but it works fabulously for me with my bread recipes, and I know you can have success with this method as well.
The Printable Version can be found here.
First off, here's what you'll need:
INGREDIENTS
3 cups luke-warm water
1/4 cup sugar
1 1/2 Tbsp. yeast
1/3 cup oil
1 Tbsp. salt
6 - 7 cups unbleached coarsely-ground white flour (You can use regular
all-purpose flour with success as well. It will make a softer,
less-coarse bread. I'll be using all-purpose white flour in the photos below.)
How to Make Homemade Bread

1. Measure out 3 cups of lukewarm water. It should be only slightly warm to the touch.

2. Pour the water into the mixing bowl.
(Note: You don't have to have a standing mixer to make this bread. You can use a regular mixing bowl, a spoon, and your own hands.)

3. Measure out 1 1/2 tablespoons of yeast, and add it to the bowl.

4. Measure out 1/4 cup of sugar (honey works well too).

5. Add the sugar to the water and yeast.

6. With a spoon, stir the yeast and sugar together for a few seconds. You are just getting the yeast wet, and spreading out the sugar to help the yeast "grow." It's fine if clumps of yeast remain.

7. Let the mixture sit for at least 10 minutes to allow the yeast to "grow." It's okay if it sits longer than 10 minutes. I've let it sit 30 minutes with no problem.

8. After about 10 minutes, your yeast should form a big bubble on top of the water.

9. Measure out 1/3 cup of oil.

10. Add the oil to the bowl. There is no need to stir.

11. Add 6 cups of flour to the bowl.

12. Add 1 tablespoon of salt to the bowl.

13. Mix the dough on a low setting for 5-8 minutes. (I use a "2" setting on my KitchenAid.) If you are using a spoon and your hands, stir the mixture together as best you can, then knead the dough with your hands for about 10 minutes. The dough should be stiff enough to start to pull away from the side of the bowl while being kneaded/mixed.

14. Finger tap the dough to see if it has reached the desired consistency.

15. If your dough is so sticky that it easily stays attached to your finger after being lightly tapped, it needs more flour. Add 1/4 - 1/2 cup at a time and incorporate it well.

16. Test the dough with a finger tap again.

17. The photo doesn't show it very well, but the dough will attach to your finger and begin to stretch up a little, only to detach itself from your finger early on, leaving you with a tiny amount of dough on your finger tip.

18. The dough is ready to rise when it passes the finger test.

19. Turn your oven ON for about 30 seconds, then turn it back OFF.

20. Cover the bowl of dough with a dishtowel or loose saran wrap coated with non-stick spray. Fill a glass bowl with warm/hot water.

21. Place the bowl of dough inside the warm oven on the upper rack. Place the bowl of water on the lower rack. Ignore the messy state of my oven with blackened apple pie drippings on the bottom.

22. Close the oven door and let the bread dough rise. I usually let mine rise about an hour.

23. One hour later... time to check the dough.

24. Looks good to me! Time to take the dough out of the oven.
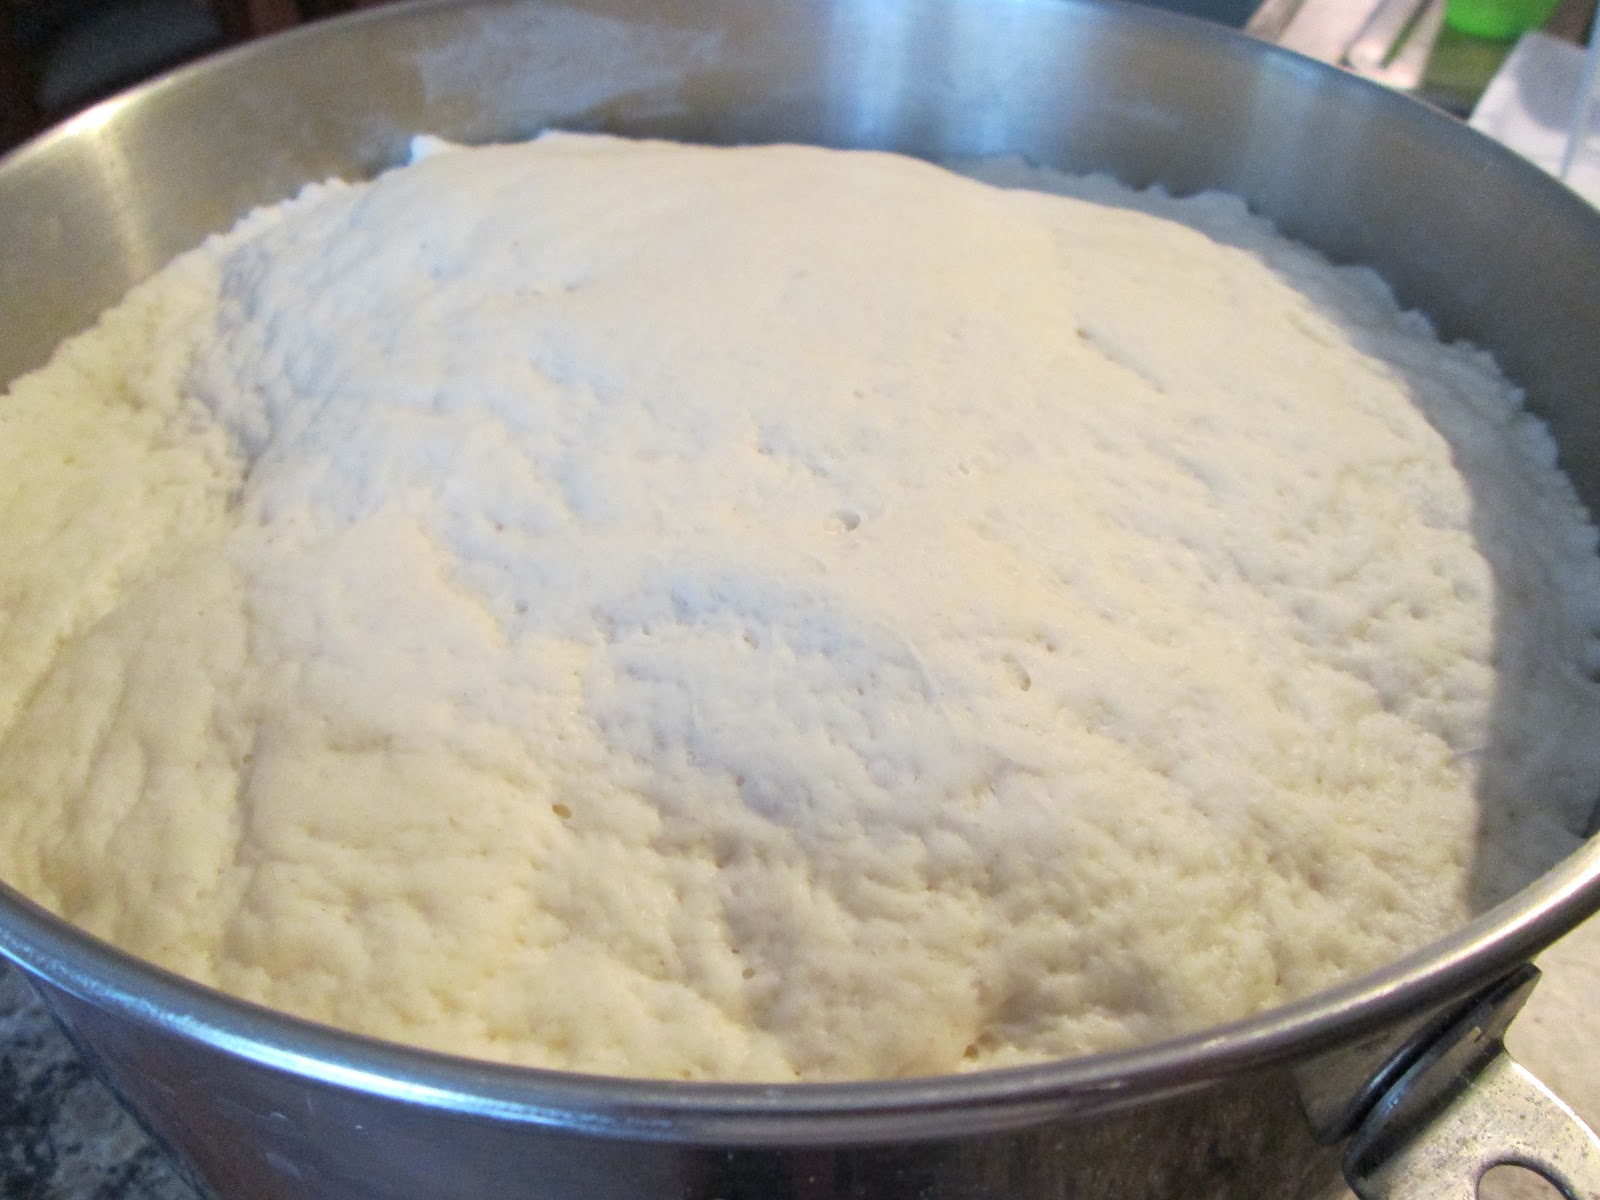
25. The dough pre-punch down.


27. Knead the dough for another minute. 10-15 turns should do it. It will be smooth, and elastic.

28. The dough is ready to be shaped into loaves, but FIRST...

29. Grease 2 bread pans. (I use non-stick spray... you can use butter or shortening if desired.)

30. I'm sorry! I tried desperately to take pictures while shaping the loaves, but doughy hands and cameras do not mix, and I couldn't pull it off by myself. You didn't miss much. I'm NOT as technical as others are when it comes to shaping the loaves. I prefer to eliminate the step of rolling the dough out on the counter and having one more surface to clean. Instead, I eyeball the dough and pull roughly half of it out of the bowl with both hands, and start shaping it into a loaf-like form. Then, I plop it into the pan, and do a little more shaping (because it inevitably looks junkier after I let go of it) while it's in the pan. I push it around with my fingers. Then, I tilt the pan up on it's side, and let the dough slide to one side of the pan. Then I tilt the pan to the other sides as well, letting the dough form itself into a loaf. This only takes a minute.

31. See? Not perfect, but definitely passable, and it'll turn out just fine.

32. Cover the loaves with a dishtowel or loosely cover in saran wrap that has been coated with non-stick spray. (By the way, the dough never sticks to my dishtowel.)

33. Let the dough rise. When the top of the dough is 1-2 inches higher than the lip of the bread pan, it's ready to bake. It started rising at 12:56...

34. ... and finished rising at 1:40. On the counter, it takes my dough about 45 minutes to raise. Check it out:

35. Looks like it's about ready. When the loaves are almost done rising, preheat the oven to 375 degrees.

36. They are ready to be baked. Notice that one is slightly bigger than the other. That's what I get for eyeballing it. Lucky for me, they're both going to end up looking beautiful, and tasting delicious. Put the loaves in the oven and bake them for 25 minutes.

37. Bake for 25 minutes, and then... Ta Da! Fresh, beautiful bread!

38. Immediately remove the bread from their pans onto a cooling rack.
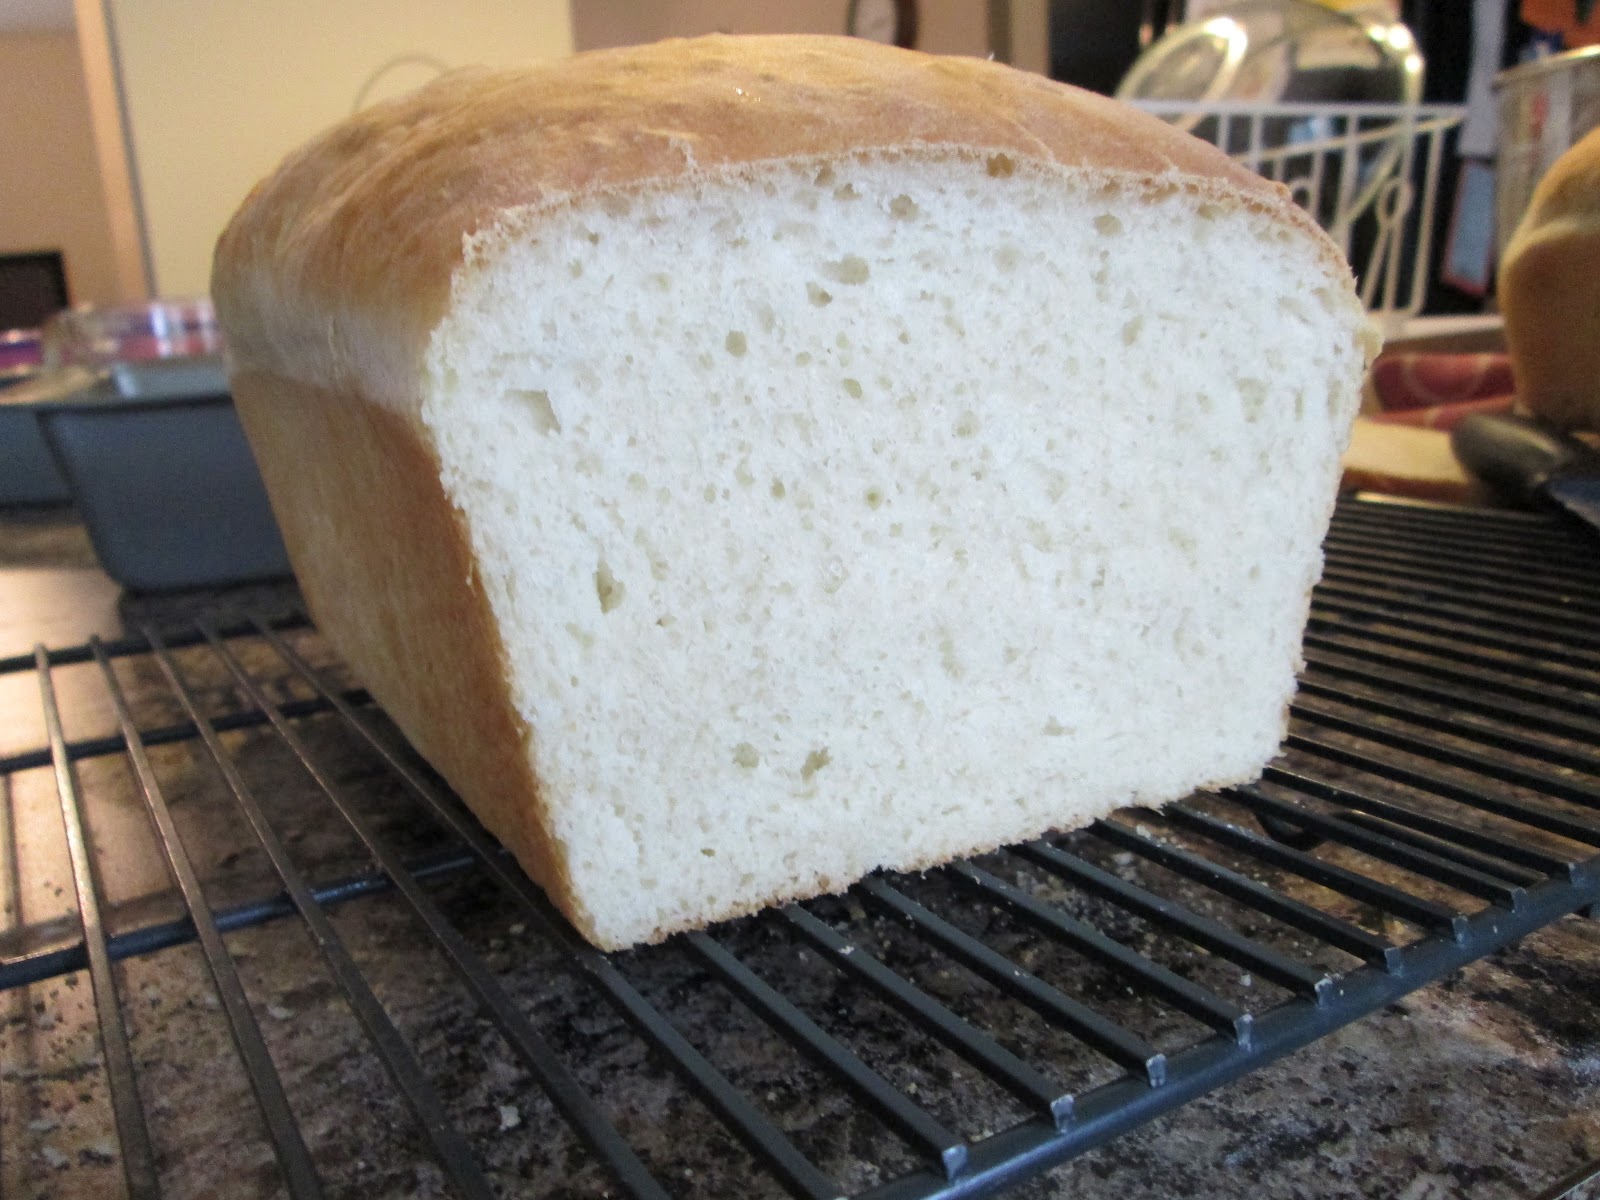
39. Slice it up. Break out the butter and honey. Take a bite... and don't worry... Involuntary closing of the eyes, sighing in delight, and savoring of the moment is completely normal.

40. Slice it up again... and again... and again.

41. While it cools, the crust of the bread may shrivel a bit. This is normal. Allow the bread to cool completely to room temperature before placing it in a bread bag. We put one loaf in the freezer, and take it out to thaw at least a couple hours before we'll need it.
*If you have any questions feel free to comment or email me. I'm more than happy to help!
Love it. Great job!
ReplyDeleteI'm off to my kitchen to make this right now! I "pinned" this recipe the other day and it got all kinds of attention. After I make it today, I'll be posting it on my cooking page on Facebook with a link back to your blog. It's amazing to me that people can't get enough bread! Thanks for the recipe!
ReplyDeleteWow! I'm flattered that you're going to feature the recipe on your Facebook page. :) It really is a great, easy, delicious bread. I hope you love it!
DeleteAndrea....the bread is JUST as you described!! Oh man..SO good! The only thing I did different was use half whole wheat flour and half all purpose flour...and that was only because I didn't have enough all purpose. Still VERY VERY good! Thanks again for the recipe! Here's a link to my Facebook page if you want to take a peek:
Deletehttps://www.facebook.com/simple.fare
Yay! Good job on the bread! I'm so happy you loved it! I checked out your page... cool stuff!
DeleteThank you so much for sharing the recipe. I tried and it came out well.
DeleteI am going to give this recipe a try! A few questions..if you were to use honey in place of the sugar..do you use the same 1/4 C? And in all the recipes I've been looking thru..preheat times vary from no preheat to preheat for 5 mins..do you allow the oven to preheat totally? Thanks for posting the step by step!!
ReplyDeleteIf you were to use honey in place of sugar, you would also use 1/4 cup. You are right about recipes varying on pre-heat time. There are many methods for baking bread and having great outcomes. One bread recipe that I enjoy has you put your bread in a cold oven first, then turn the oven up to the right temperature and baking it that way. This method has the bread finishing it's rise inside the oven as it warms up to the desired temperature. When I bake bread, I let the dough finish its rise OUTSIDE of the oven, and bake it in the oven that has reached 375 degrees. I hope this answered your questions! Good luck with the bread!
DeleteIt worked great! Thanks for the answers! Will be making this again and will recommend it too!
DeleteFirst time bread baker here! I was so excited to find this recipe, as my husband and I only have one child so an entire loaf of store bought bread normally goes bad before we can use it. This recipe was so easy to follow and my loaf of bread came out PERFECT! Thank you so much for saving my family money!
ReplyDeleteYou just made my day, Mommaofone! I'm happy it turned out so well for you. :)Thanks for letting me know how it went!
DeleteFirst time baker trying it out right now!!
ReplyDeleteWooHoo!! Good luck!
DeleteAnd...oh my! Amazing! Thank you for the detailed steps. My family can't get over how delicious this bread is! I also tried rolling one loaf out and spreading raisins and a cinnamon-sugar combo. I would only suggest cooking this loaf a little longer, the inside swirls were still slightly doughy. Thank you for sharing your recipe. I'm moving on to whole wheat next!
ReplyDeleteI'm so happy it worked out well for you! The cinnamon rasin idea is genius. :) Good luck with the whole wheat!
DeleteIm a new bread maker and im happy that I found this resipe. I will try it out on wensday
DeleteI'm trying this right now but it doesn't seem to be working. It seems like there's too much water to flour because it's so sticky and I barely got to knead it again to put it in the bread pan. And was I right to use AP flour rather than bread flour? I added more flour to it to help but I have sticky dough everywhere. Any tips?
ReplyDeleteSorry you're having trouble. The water listed is the right amount, and AP flour works great! It's what I used for the tutorial. If you're new to making bread, or haven't made it very often, finding the right amount of flour can be tricky. The 6 cups is a starter amount. Depending on where you live, or even weather conditions, (elevation, humidity, etc.) can slightly affect how much flour you need... Trust me, I've lived all over the place! When you knead it, the dough will stick to you hands and fingers, but it shouldn't be so sticky that you can't get it off your hands when forming a loaf. If it is, there's not enough flour in the dough. The best tips I can think of are posted above. Just be sure to test the dough with your finger to see how sticky it is. If you touch the dough after mixing it all together, before letting it rise and it sticks to your finger and stretches up without detaching from your finger when you lift your finger, it's too sticky. If it is only slightly sticky to the touch, it's perfect! Trial and error is often a big part of baking (especially bread). I hope this helps... let me know how it turns out for you!
DeleteShould it take longer than 1 hour to rise in the oven? I'm cooking it right now, and it has 12 minutes left and hasn't raised as much as yours :( I used hot water and preheated my oven for almost a minute instead of 30 seconds. Any suggestions?
ReplyDeleteAny suggestions for why it may not rise in the oven? I have had mine in there for almost 50 minutes so far, just peeked and hasn't raised as much as yours (obviously there is still 10 mins left). I used hot water and preheated my oven for 1 min instead of 30 seconds... help? :(
ReplyDeleteYou have to be careful when using your hot water with yeast. If the water is too hot you will kill the yeast and it won't rise at all. The water should be in between 105-115 degrees.
DeleteWell.... I just saw what you did. My bread might have raised higher than I thought - you put your towel touching the bread so you can notice when it was raised... I just put my towel straight on top so there was no difference LOL First time making bread, so glad I came across this recipe!! :)
ReplyDeleteFirst time? Wow! Good for you! It's always intimidating/tricky the first time. I hope it ended up turning out well for you. Thanks for giving it a try!
DeleteTrying this now! So nervous! I am even doing it on the sly so that if I fail my husband will never know! Thank you for posting this recipe!
ReplyDeleteCan't wait to try! when you freeze your second loaf, do you do anything to let it thaw out?
ReplyDeleteI've never made bread before let alone much success baking or in the kitchen period. I think I did rather well especially considering I had old yeast and bottoms of old bags of flour that were stuffed in the back of the cupboard. Thanx for the easy tutorial.
ReplyDeleteHello! So glad to have found this recipe and I'm eager to try it - but I have a few questions... First, what size bread pans are those? Also, do you use jarred yeast that you can scoop out 1.5 TBSP? I have about 10 packets of yeast I *just* bought last week and would like to use them. I can easily just dump them into the spoon and measure them out, but I thought maybe you might know how many packets are equal to that 1.5 TBSP amount... ?
ReplyDeleteIt depends on the packet of yeast. A .25 oz packet is 2 1/4 tsp. Some packets might have a little more. So... if you use one full packet and about half of the second one, that would work. It doesn't have to be completely exact. Back before I invested in jarred/bulk yeast, I used packets too. I think I either used 1 1/2 or sometimes if I was lazy, I just dumped two packets in. It only made the bread a bit more yeast-y. (Such technical talk!) ;)
DeleteOH! One more thing - How do you freeze BREAD? Sound ridiculous that I'm asking? lol... What do you wrap it in, just plain plastic wrap? I am such an accomplished cook, but NOT an accomplished baker... can you tell? lol...
ReplyDeleteLet it get to room temperature, then you have a few options: Use a bread bag that you've saved from store-bought bread, or wrap it in saran wrap, or use a large freezer bag.
DeleteLooks yummy; can't wait to try this! One question: on Step 27, do you knead the dough by hand or in the mixer? Thanks!
ReplyDeleteI knead it by hand. Good luck!
DeleteI've been wanting to make homemade bread for a while now, but the recipes in my cookbooks always seemed so challenging! I was so happy to find your blog with pictures. It was so easy to follow! I made it last night and it was so good! Thanks for taking the time to make this tutorial.
ReplyDeleteThanks for the tutorial! I made a loaf tonight, and it was a huge hit. I'm comfortable with cooking, but generally intimidated by baking. I feel like I've crossed something off my bucket list now that I've baked bread at home--even kneaded it with my hands! I'm so pleased, and excited to make more!
ReplyDeletethis is my second time making this bread. i have one question. when i was mixing it, the dough started climbing up the dough hook. any suggestions?
ReplyDeleteIt's normal. :) My bread dough often does the same thing. My dough will climb to the very top of the hook at times. Anyone else have a concern about this?
DeleteBill, what happens if it does'ent look like your doe is rising?
ReplyDeleteI used store brand yeast,maybe i am just impatient.
This is my first time making yeast bread {I usually make soda bread} and I let it rise in the oven with a bowl of hot water and when I checked on it, it had come up out of the bowl {which may have been too small to hold it} and was very elastic. So elastic that I couldn't kneed it without it sticking to everything. I added a little more flour and finally got it into a loaf pan and am waiting to see if it will rise again. Any advice on where I may have went wrong?
ReplyDeleteHi Emily! You're probably right about the bowl being on the small-side. :)It sounds like the dough could have used more flour before rising the first time. Bread dough, is going to be sticky when you knead it, but still somewhat manageable. (I end up washing bits of dough off my hands after kneading.) Those are the only things I can think of. I hope your bread rose in the pan, and baked well for you.
DeleteI'm eating a slice now and it is delicious. This was my first attempt making bread and it worked perfectly. Thank you so much for the detailed directions!
ReplyDeleteJust finished sampling my first ever attempt at bread making and it was delicious! Thank you so much for the detailed instructions!
ReplyDeleteCan whole wheat flour be used?
ReplyDeleteYes! Just make sure to start out with less (6 cups) and add me if needed. Whole wheat flour has more gluten in it, and if you use too much from the get-go, your dough will be too stiff. Good luck!
DeleteJust came back from the store and I'm all geared to make this bread starting right now!! I've never made bread (or anything involving yeast) before, so I'm nervous and excited!! Thanks for the recipe - I repinned it on Pinterest! Happy Thanksgiving!
ReplyDeleteGigi
Huh. I just made this recipe, and my bread didn't turn out nearly as pretty as yours!! Guess I need some practice! ;)
ReplyDeleteI just made this yesterday because we were out of bread and I didn't feel like hauling my two little boys to the store for more, and spending probably $60 on random other stuff we really don't need. My oldest likes it more than store bought, and actually ate his crusts. We used it for grilled cheese for dinner tonight and it was so good. No more store bought bread for us! Thanks for a good soft sandwich bread recipe!
ReplyDeleteI've never made bread by hand before & this recipe is so awesome. I'm about half way thru now & my lil loaves are rising on the counter-I'm so excited!
ReplyDeletePS- 1½ tbsp is 2 packets of yeast. Each packet is 2¼ tsp so 2 is 4½ tsp. 3 tsp = 1 tbsp & 1½ tsp = ½ tbsp. Viola! (I hope this was helpful & not too know-it-all lol!)
Tried this recipe today and my bread turned out wonderful...I am by no means a baker so I was extremely proud with the results. I'm anxious to try your recipe for the granola bars next. Thanks for the recipe !!!
ReplyDeleteThank you so much for this recipe. I think I am starting a new tradition baking bread every Sunday. My house smells delicious!
ReplyDeleteI only have one loaf pan and live by myself so I don't need 2 loaves... would this dough freeze or refrigerate ok until I needed it?
ReplyDeleteMy loaves are re-rising right now on the counter because I set them in the oven to rise at first and they absolutely ballooned over the top and down the sides. So I took them out, reformed them, and turned the oven on to preheat. Before the oven preheated, they were again up and over the top and down the sides! They are rising for the third time now. This is the "risiest" bread I've ever made! Fortunately it re-rises nicely. Looking forward to lunch time. :)
ReplyDeleteLooks amazing! Are your pans 9x5?
ReplyDeleteHi Elaine! Yes, they are. Let me know how it turns out if you try it. :)
Deletewhat size are your bread pans
ReplyDeleteThey are 9" pans.
DeleteAhhhh....Maybe I should've looked at this first before I decided to go all Betty Crocker lol. Oh well I see where I made my mistake, my bread still tasted good just didn't rise very much, I shall try it again!
ReplyDeleteTried baking bread for the first time and it came out perfect, I used 6.5 cups of flour and 1 cup of wheat germ. Thanks for the step by step!
ReplyDeleteI have two questions: DO you have a recipe to make Whole Wheat Bread? and If I want to bake one loaf now and freeze the second loaf dough til I am ready at what step should I stop and freeze it? First time bread maker but my husband and I are starting to do the Clean Eating Diet and I love the idea of homemade bread. Any tips are greatly appreciated. By the way I adore your website!!!!
ReplyDeleteMel
Hi Mel! I'm so happy you found this site! I currently have two bread recipes listed in the recipe index. You can use strictly whole wheat in both recipes. You'll just want to start with 6 cups of flour and slowly work in more... whole wheat flour is more glutenous than all purpose. :) If you follow the steps in this post, your bread should turn out great. As far as freezing the dough goes, I like to freeze it after I've let it rise and punched it down (before forming it into loaves.) Then, when i'm ready to bake, I take it out, let it thaw on the counter, form it into loaves and let them rise in their pans before baking. If you have any more questions don't hesitate to ask!
DeleteI made your bread this evening and it was amazing!! But it turned out very "holey" (not like regular bread, or the picture of your bread in the picture) I made it by hand because unfortunately, I don't have a big mixer...could that be why?
ReplyDeleteHi Kimberly. I'm sorry about all the holes. I don't think it's from not having a mixer though. I get holes from time to time also. They tend to appear when the dough hasn't been kneaded enough after it's first rise. When the dough rises the first time, there are a ton of little air pockets in the dough. When it's time to punch it down, you have to REALLY punch it down, flatten it out, and make sure you press out all the little air bubbles before forming it into loaves, or those little air pockets will remain, and your baked loaves will have holes in them. I hope this helps!
DeleteSo, could you use butter instead of oil? Can't wait to try making this, it'll be my second time making bread. First time was with another recipe that was also fantastic. My husband and I are fasting from soda and "desserts", and I just LOVE baking. So, I thought I'd try out a few bread recipes :)
ReplyDeleteTo be honest, I've never tried it. Oil and butter are different kinds of fats: oil stays liquid at room temperature, and is 100% fat, where butter is part fat, part milk solids, part water and is solid at room temperature. So, I think it could work to use butter, but you'd have to change the amount... and I'm not sure how much you would need. Sorry! I know this answer is no help. If you decide to try it, PLEASE let me know how it goes. I'd love to know!
DeleteThis bread was amazing!!! Going to be our new family favorite! Thanks for sharing. Every step was just as it truly came out! Blessings to you and thanks again!
ReplyDeleteI'm glad you enjoyed it, and flattered that you'd consider it a "favorite." :)
DeleteSo wonderful!!! This is my first time baking successful bread! It tastes amazing and made the perfect grilled cheese. Thank you so much!
ReplyDeleteI will start by saying that this was my first time making bread...I made this yesterday and found it super easy to follow with your instructions and was excited to make bread for the first time. The end product looked great and I was SO excited to slice into a loaf and immeadiatly knew something was wrong. It was really dense and kind of dough-y. My boyfriend loved it as it but I knew it was wrong. I did the finger sticky trick and I thought it was good but when it came time to form the dough to put in the pans it was a VERY sticky mess. Did I need more flour? I thought I did everything to the T and can only think that I needed more flour. Any suggestions? I would LOVE to make this again and have it work. HELP
ReplyDeleteHi Angie,
DeleteI'm sorry your bread was kind of doughy and dense. If it was sticky to the point of being very hard to work with when you put it into the pans, then yes. You needed more flour. A little stickiness is good. So much stickiness that you can't really work with the dough is bad. Also, did you let it rise 1-2 inches above the level of the pan? If not, that would account for the extra density. If it was doughy after baking, it may have needed to be baked a few minutes longer. Was the oven pre-heated completely before baking? The other thing is that ovens can vary. I hope this helps! If you try it again and have more problems, please let me know, and we'll see what we can figure out.
Andrea
I made bread once before (many years ago) and it was so hard it could have been used as a brick. I had never again been tempted to try until I saw your step by step instructions. I have made it twice now and all I can say is thank you very much :)
ReplyDeleteYou are so welcome. I'm glad it worked out for you this time! :)
DeleteI have to tell you that this bread is wonderful! For the past month, I've been making two loaves every Sunday to last my family of five for the week. We typically run out on Friday and my husband picks up a loaf from the store, and it bugs me that I don't have any homemade bread to give them. Thank you so much for sharing! Now I just need to get my act together and make a mid-week batch so we will always have some on hand.
ReplyDeleteLori, I can't tell you how happy that makes me! I'm so glad your family enjoys the bread. I have a family of five also, and end up finishing our two loaves almost exactly when you do. I end up making my next two loaves the day before I know we're going to run out. (But then, I have the time to do so, and I know many people don't.) Thanks for taking the time to let me know your family enjoys the bread. Made my morning!
DeleteI just found this on Pinterest, and I'm so excited to try it! I'm a working mom of 3, and I work nights so either the hubs or I have the kiddos covered. Lately I've been delving into homemade: cooking, cleaning agents, etc; but bread has scared me, lol! This one doesn't scare me! Monday is my off day, and I'm baking bread! Thanks!
ReplyDeleteWow! Wonderwoman! :) I'm glad you are going o try this out. It's totally worth it! If you have any questions about the steps, let me know and I'll be happy to help. :)
DeleteAndrea - This bread turned out so so good. The toast from it is beyond marvelous. So good. (I don't know if my boyfriend will ever willingly buy bread again.
ReplyDeleteMy grandmother used to make bread with me when I was young, and i was worried that I'd never be able to make bread again, because her pie crust recipe just never turned out as well for me, but this recipe was super easy, and I LOVE the tutorial, despite not letting it rise in the oven.
Thank you!
YAY!!! If it gets kudos from your boyfriend, it's gotta be good, right? ;) Thanks for the nice comment!
DeleteAndrea- I'm currently in the process of making my first homemade bread and let me tell you, I am super excited!!! My boyfriend and I are still in college, money's tight, and we eat tons of bread for sandwiches everyday, so that makes this even more exciting! Can't wait to finally taste my hard work! Thanks for the recipe, it was super easy to follow! :) Thank You!
ReplyDeleteThat's GREAT!! I hope you love it. :) Let m know how it turns out, okay?
ReplyDeleteFirst time baking bread and I just pulled it out of the oven. It looks and smells wonderful. Cant wait to cut into it to taste it. Thank you for the picture guide, helped out alot. Ok couldnt resist to cut into it. i think my one pan needed to cook a few minutes more but otherwise delish. thank you so much
ReplyDeleteNow that I see how to tell if the dough is ready in the mixer, I might be able to do this. My bread sticks that I made were tough because I didn't know what I was looking for. Thank you for the tutorial.
ReplyDeletehi, andrea
ReplyDeletewant to make this asap but wondered if this could be divided into rolls and allow to rise in the oven just like with the bread pan? thanks for all the help and encouragement.
farnungmetz
Yes! You can shape it into rolls, and let the rolls rise in the slightly warm oven. Bake time will be more like 20 minutes or so. :) Good luck!
DeleteThis is my first time making bread. (It's cooling as I type this). Love your step-by-step instructions. They came out of the oven looking just like your pictures. Thank you so much for sharing this easy recipe.
ReplyDeleteLike many other's on this site this will be my first time making bread :). So far so good the only thing I'm worried about is that I don't know if my oven got warm enough for the dough to rise in. I did it for a little more than 30 seconds but I don't think it really got warm. Hopefully this won't effect the dough too much. I still put in the warm/hot water on the bottom so hopefully it'll be okay.. Guess I'll find out in another 31 minutes! I'm still excited though :). Especially since the recipe was so easy to follow.
ReplyDeleteI'm sure your dough will be fine just so long as you let it rise till it was about double... like you saw in the photos above. Technically, you don't need to let it rise in a warm oven... I just do that to speed up the rising process, espcially in winter when my home is colder. Let me know how it turns out for you! I'm excited to hear!
DeleteI am also a first timer. My bread is in the oven as I type. Love that the recipe was easy to follow and that the bread was easy to make. Being a mom of 5, it was easy to do this recipe and do mom duties at the same time. Next time I make this I will have to let the kids help.
ReplyDeleteThanks
This recipe was easy and delicious. I gave a loaf to my parents and they enjoyed each piece my husband has asked me to make bread instead of buying it ever again. What a compliment and testimony for this recipe. Thank you for the step-by-step instructions. God bless you.
ReplyDeleteHi, this will be my first attempt to make bread. I have a few questions, hope you can advise me.
ReplyDelete1. If i'm gonna make only one loaf, if i use 1/2 of the ingredient listed will be fine?
2. Some receipe i searched for mentioned milk in ingredient. Will it change the outcome if i added milk in ur receipe? Have you tried using milk? any advice on this?
I'm happy to try to help you out:
Delete1. If you're only making one loaf, then yes... cut the ingredients in half.
2. I've never made this recipe with milk instead of water. I'm sure the outcome would be different, but I couldn't tell you how MUCH different. If this is your first time making bread, I'd stick with the original recipe just to make sure all goes smoothly. However, If you decide to use milk, just heat it up slightly in the microwave till it's luke-warm.
I hope this helps! Let me know how it goes for you. :)
oooooooooooomg thanks i have try so many recipes and none have worked for me finally thank you thank you it came out delish and just as perfect as yours wow i loved it
ReplyDeleteAndrea. Thank you so very much for posting this tutorial. I've made my best bread yet after following it(5 batches to date). I was missing the punchdown step and my breads hadn't been rising appropriately. My last loaf was by far the best yet, however the top did fall (think I need to knead it more) it tasted wonderful and my wife and I ate half a loaf as it cooled=)Once again thank you for the help provided. -Allen
ReplyDeleteProblem solved. It was definately not kneading the dough adequately that allowed it to fall in the middle. After doing additional research on the web, I have learned about the technique of testing my dough by "windowing".
ReplyDeleteThat is:
Take a pecan sized bit of dough off my soon to be bread and roll it into a ball, then stretch it out between both hands, rotate as needed, and if able to stretch it thin enough to be transluscent without breaking, then, it has been kneaded enough to be sent on to it's first rise.
Now my loaves have developed lovely fluffy pillow tops and hope this can help another new baker.
Thank you so much for including a tutorial for this recipe! I have done quite a bit of baking but I've always been afraid to try actual bread. I am so glad I did. I wasn't sure how mine would turn out - I'm in Florida and since it's incredibly humid right now I think I needed more flour. I felt like I had added way more than called for, but it didn't want to form into a loaf and stuck all over my hands. Plus I let it rise for too long in the pans, and the bigger loaf went over the side of the pan and stuck to the other loaf. The tops looked messy when they were done but they tasted AMAZING! Thank you so much!
ReplyDeleteI have now made your bisquick mix (used it for chicken pot pie), crock pot refried beans, bean dip, bean and cheese burritos, chocolate chip cookies, pizza sauce, and now today the hamburger buns and this bread. Everything has been great! Thanks again!
First time bread maker here. My 8 year old daughter and I had SO much fun making this today. I don't think we added enough flour because it was still real sticky at the "punch" phase. But it turned out good anyways. Can't wait to make it again!
ReplyDeleteI made bread for the first time using this recipe. I am very pleased with the results, even though I forgot to add the salt because I was so focused on getting the dough consistency just right. It still tastes very good. I tried, but could not allow the first loaf to cool properly before cutting into it and buttering a few delicious slices. Like other posters, my dough overflowed the pan before the punch-down. My dough was very sticky and I had to keep adding more flour. In all, I estimate that I added at least another two cups of flour before I was satisfied with the consistency. I'm in the south and it is still warm here, so that's probably why. I put the remaining dough in the freezer and it continued to rise! That yeast is certainly potent! Thank you for the pictorial. It was extremely helpful!
ReplyDeleteI've been looking for a good bread recipe and I think I've found it! I made this early this morning and my house still smells wonderful! (It's after 2:30) The bread came out golden brown....moist inside with a slight crunch on the outside. (Just what I've been looking for!) But most of all, it has terrific flavor. (Something I've found other recipes to fail in.) It's delicious! I did have to go with 7 cups AP flour. And I allowed it to finish proving in the oven while it preheated. (So it proved on the counter 30 minutes) Also, my oven cooks pretty low so I raised the temperature about 10 deg. (385) and set the timer 40 minutes. (Preheating time included.) And it turned out perfect. Thank you so much for this recipe! I've been browsing the rest of your site and it too is awesome. Thanks so much!
ReplyDeleteThank you. This is the first bread recipe I have ever made and it was very successful. I have shared your recipe with many friends. :)
ReplyDeleteI have a question! From the looks of your photos my bread looks a lot more wet and sticky. is that suppose to happen? Yours looks pretty dry. I used 7 3/4 cups of flour and I live in FL. What could I be doing wrong? Thanks!
ReplyDeleteHi Charisma,
DeleteI'm so sorry to have taken so long to get back to you... having a newborn in the home has occupied a lot of my time and mental-space. :) My dough is always slightly sticky and "wet," but manageable when I form it into loaves... I do get sticky dough-covered fingers though. :) If your dough still looks way too wet, slowly add flour 1/4 cup at a time till you get the right consistency. Sometimes humidity/elevation play a role as well. I now live in a drier climate, and use less flour than when I lived in the mid-west. I hope this helps! Good luck!
I wish I could show the monsters I call bread loaves that come out of the oven when they are done cooking. Even if I don't let them rise 1 inch above the pan they are about 3 inches when done from the oven. Not sure what I'm doing wrong but still tastes good. Just would like a normal size bread loaf. Do you think I could stretch the mix into 3 bread pans maybe? Thanks for any future advice.
ReplyDeleteRachel, your comment made me laugh! This does result in some large loaves for sure. I grew up eating them that way. You could definitely divide it into three loaves. However, I'd use 8" pans instead of 9" pans. 9" pans will yield three short loaves. Three 8" pans would be just right. :)
DeleteI also wanted to ask how you freeze the bread dough, or do you only freeze already made bread?
ReplyDeleteI like to freeze the dough after I've let it rise and punched it down (before forming it into loaves.) Then, when i'm ready to bake, I take it out, let it thaw on the counter, form it into loaves and let them rise in their pans before baking.
DeleteCan you use a bread maker to make your bread recipes?
ReplyDeleteI've been told that it works with a bread maker, but since I don't own one, I can't tell you first hand. :)
DeleteThis bread recipe was absolutely wonderful. I have done my fair share of baking and homemade bread has always been a challenge, despite trying several different recipes (including some popular King Aurthur ones). They would either be too tough & dense, or would not rise well, or required a bread machine (which I don't own).
ReplyDeleteThe ingredients were so simple (though I did use King Aurthur bread flour for this) and non-fussy. I kneaded my dough by hand as I don't have a stand mixer and the results were fantastic!!! I was also amazed at how well the 'oven spring' was when baking (no steaming pans of water required!). The taste and texture was light and fluffy.... everything I like about store bought bread without the price tag and extra ingredients!
Thank you for sharing this wonderful recipe!!! Your step-by-step pics were super helpful too. I will be making this bread for years to come....!!!
Thanks for your kind words, Rashonda! I'm so happy you liked it!
DeleteGoing to try this recipe this weekend, after reading all the comments I cannot wait to try it. My question is, is it a good idea to let my 3 year old help me make it. He loved making cookies for Santa.
ReplyDeleteHe can definitely help with some things! After you've measured out the ingredients, let him add them to the bowl. He can also help punch the dough down after it rises. Mixing it will be too hard... It requires more muscle than a 3 year old has. Of course if you are using a kitchen aid or similar mixer that doesn't matter anyway. Have fun! :)
DeleteI just found your website and am really enjoying it!
ReplyDeleteI have been making bread off and on since I was a youngster and wanted to give you a little tip that just pushes the appearance of the loaves over the top. As soon as you take the bread out of the pans and put it on the racks to cool, take a pastry brush and brush the whole top (anything that would have been visible before you took it out of the pan) with butter. Not too much, just a nice thorough coating. It makes it look even more golden, takes care of the little wrinkles and has a lovely glisten to it!
Thank you so much for all your tips -- I really need to start menu planning.... Trying to figure out what to make each night and get the homeschooling done is just so frustrating for me.
Thanks, Wanita! My mom always brushed the tops too. They definitely look prettier that way... We're just trying to be a tiny bit healthier. :)
DeleteAlso, way to go with homeschooling! Keep up the great work with that! I know menu planning can be tough... Especially if you have a million other things going on.
Deletefirst time baking bread and it was a hit!! thanks for your guidance.. couldn't have done it without your perfect instruction... and it was sooo pretty ;-)
ReplyDeleteThis bread was so delicious! This recipe was amazingly detailed I was able to follow it perfectly and I'm 12 years old. Everyone in my family loved the bread and I did too! thanks for the recipe, definitely going to make it again!
ReplyDeleteYou mightve already answered this, I apologize if so I didn't read all the comments. How do you store your bread? I know you said bread bag but what kind? How long does it stay fresh? I'm so excited to try this I've been looking for a recipe I liked. Just need to get a stand mixer now. Will a regular hand held mixed do or does it work differently. I'm not up for hand stirring. Haha.
ReplyDeleteHi Brittany,
DeleteIf you are trying your hand at making bread for the first time, I'd save a few bread bags from store-bought bread. If you get into it, and decide to go mostly/full-time homemade, then you can buy bread bags. They are in grocery stores, or you can even find them on Amazon if you search "bread bags."
Definitely do NOT use a hand mixer. You'll have a mess on your hands, and it won't work in the way you want it too. The standing mixer has different attachments, and you'd want to use the dough hook. If you know someone who has a stand mixer, maybe you could borrow it before buying one, because they can be a little pricey.
Hope this helps! Good luck!
Hi, I froze half of my dough, thawed it, put it in the loaf pan to rise, and it's been sitting for about 5 hours and it hasn't done anything in the pan. Is this normal? I followed all the steps exactly and let it thaw completely, and let it come to room temp while trying to rise. Any suggestions on what to do? Just let it sit out longer until it starts to rise? Thank you!
ReplyDeleteHi Jackie,
DeleteWow! I think your comment got lost in translation. I'm just now seeing it! I'm so sorry I didn't respond sooner. I'm not sure what your dough looked like after all this, but the dough has to completely thaw, and then begin to warm to room temp to be able to rise. From what you said, it sounds like you did all this, so I'm really sort of stumped as to why it didn't rise for you. If it had been me I would have just let it sit longer. Maybe I would have covered it with a dishcloth and put it in a slightly warm oven to helps speed the process. Did it ever end up rising for you? Again, I'm so sorry it took me this long to respond.
I'm curious, have you ever figure up the cost/loaf? I'm just wondering if it's more cost-effective to make the bread or buy it for $1 a loaf at the discount store. (Although I'm sure it' way more delicious!)
ReplyDeleteWhen I figured the cost for this particular recipe (2 years ago), it was $0.39/loaf. That might be a few cents higher today, but definitely cheaper than dollar. However you have to decide if it's worth your time and effort, because your time is valuable too. I happen to love baking/cooking, and I'm a stay at home mother, so I've decided it's worth it to me. Here's a link to the cost breakdown of the recipe listed above: http://penniesandpancakes.blogspot.com/2012/09/grandmas-country-white-bread.html
DeleteI made some today and it turned out GREAT!!! Pinned!
ReplyDeleteAs far as slicing the cooled bread goes, yrs ago I bought a bread slicer guide that has proved to be an excellent buy (good for all kinds of bread produces for slicing ...i.e bagels etc.
ReplyDeleteI have found it so helpful, since each slice is consistently the same size (unless I change my mind and the size lol). I don't have a picture of my woold one ...but here is one that is very similair. Trust me its worth every penny spent...........and no I don't sell them or have anything to do with any company that does....just passing on a good tip here.
http://www.amazon.ca/TOOGOO-Kitchen-Slicer-Slicing-Cutting/dp/B0090VYA4C/ref=sr_1_10?ie=UTF8&qid=1423583675&sr=8-10&keywords=bread+slicer+guide